April 18, 2011

Bentwood Chair Makeover

For my first real DIY (Do-it-yourself) project, I decided to start slow and simple. Oh wait, slow and simple is not my style. Well then, I decided to jump right in and make over a bentwood chair. At this point, I had zero experience with sanding, priming, or painting any piece of furniture. I've also never reupholstered anything before. And I had absolutely no supplies. What could possibly go wrong?


It's like Beauty and the Beast, right? The end result doesn't look so bad after all. What you don't see in this picture are the many days months that this project of mine occupied our balcony, living room, and second bedroom. Also not pictured is D's cursing of the day I bought this chair loving support for my first adventure into the land of DIY.

And now, for the gory details. The first thing I did was remove the chair seat. Which turned out to be a total pain in the a**. See, I was under the impression that most chair seats are attached to the base by means of several screws. However, this particular Beast had the seat nailed into the base, from the top. The nails were conveniently covered by the floral ribbon that you see surrounding the red fabric of the seat. The nice lady who sold me this chair on Craigslist informed me that this chair belonged to her mother, so I estimated it to be approximately from the 1930s. Which means that those nails had approximately 80 years or so to marinade in this chair and turn to rusty projectile missiles upon my attempt to remove them from the chair seat. After battling the seat for an hour, I realized that it was broken anyway (it was cracked on the bottom), so I might as well stop trying to salvage it and make a new seat later. (Did I mention that I had never made a chair seat before?) This was quite a satisfying conclusion, actually, because now I had the freedom to go to town with this chair seat and just completely rip it off the chair without worrying about the consequences. Which I proceeded to do with great vigor.

With the seat off the chair, it was time to remove the old paint. So I went on my first of many trips to Home Depot to pick up some supplies. Normally (I sound like an expert already, right?), I would just sand the sucker down, then maybe prime and paint. But given the age of the chair, I worried about the possibility of lead paint. Now, if I had thought about this for about a minute, I would have bought a $6 kit from Home Depot to determine whether or not there was lead in the paint. But that's not really my style, so I decided to assume that the chair was covered with lead paint, and proceed with caution. At the store, I asked an employee about the more environmentally friendly option for a paint stripper (that promised a citrus smell). He claimed it works fine, just a bit slower than the nastier stuff, so I bought a can of that. Back home, I took my chair outside on our tiny balcony and sprayed it with the stripper. Although the label on the can promised that the paint would start peeling within about half an hour, after leaving the chair overnight, I didn't see a single damn bubble. Turns out this stuff works best above 60 F. Inconveniently enough, we were well into November by the time I started this mess project, and no one has ever heard of 60 F weather in New England in November.

Obviously, a little issue like cold weather wasn't going to stop me. So I kept spraying (and later, "painting") the chair with the paint stripper, and then scrubbing the hell out of it to get the paint off. When I got most of the paint off, I decided this was good enough. Which was my first mistake (or my first MAJOR mistake). Of course I didn't know this at the time, but the old paint would later bleed through the primer and the new paint. Lesson learned. Anyway, following the instructions on the can, I had to remove all the paint stripper with mineral spirits. The next thing I learned was that even if the container says "odorless", that mean absolutely nothing if it is followed by the words "mineral spirits". That stuff stunk to high heavens. So, considering it was already the beginning of December at this point, I was eager to be done with this step and take my project indoors.

After the paint was mostly off, I sanded down the chair. Then, I proceeded to prime it. Looking back, I probably should have used a latex primer (since I was going to follow up with latex paint anyway), but since the blogosphere claimed that oil-based primer sticks much better, and can be used with latex paint, this is what I went with. This, of course, upped my count of nasty, stinky chemicals used in this project to three (so far). That, and it was messy, and I had to wash my paint brush with "odorless" mineral spirits. (I ended up throwing away the expensive Purdy brush because I didn't have it in me to properly clean it). Anyway, after one layer of primer, the chair looked like this:


I still have no idea if that was enough coverage or not, but for whatever reason, I decided to do a second layer of primer. Which was probably my second major mistake. Maybe I should have sanded it between layers of primer. Maybe one layer was enough. Either way, the second layer looked even worse. Although the coverage was better, the primer was now drippy in places, and it had dried that way, so I had to sand some parts again. (Most bloggers make this all look so easy. It must be because they actually know what they are doing. But I didn't have a clue, and I am telling it exactly like the mess that it was.)

Anyway, at this point I decided that I had enough of priming, and it was time to paint. I used white, no-VOC paint (Freshaire brand), and I have to say this was actually a really nice paint to work with. No nasty fumes to deal with, and it went on smooth like butter. After two coats, the chair looked like this:


Finally, I was beginning to like my chair. Some of the old paint was bleeding through a little at this point, but not enough to bother me, so I let it go. See, making over a chair is like a Zen experience. Minus the nasty smells. It was time to make a new seat. At work, I found a discarded piece of 1/4 inch plywood (yay for free supplies). I measured out a 16 inch diameter circle and cut it out on a band saw (I was lucky enough to have access to the band saw at work). Then I went to JoAnn's and purchased foam, batting, and fabric. I cut out a corresponding circle from the the foam that I had bought and secured it lightly onto the top of the plywood with some double-sticky tape. Then I covered the foam with a layer of batting and stapled it to the underside of the plywood with my newly acquired staple gun.


At this point, I made my third major mistake. I probably should have covered my seat with three or four layers of batting to make it softer. Because now, sitting on this chair as I write this blog post, I am wishing it was a bit cushier. Oh well, let it go, Anna, let it go. After the batting was on, I repeated the stapling process with the pretty green and white fabric I had purchased. It was time to attach the seat to the chair. If you scroll up to the picture of the primed chair, you will notice that the perimeter of the seat base is actually full of holes. I suspect that the chair seat was actually caned at some point. Which was great, because I didn't have to drill any new holes in the chair to attach my seat. I decided to screw it in from the bottom with three screws using three of those holes. I pre-drilled into the new seat (not all the way, maybe 2/3 of the thickness of the plywood) and screwed in the seat. My ugly duckling had become a swan.


And thus concludes my first adventure into DIY land. I would do a cost breakdown, but honestly that would be rather depressing useless. The chair was purchased for $10 on Craigslist, but since I had no supplies whatsoever, I probably spent close to additional $140 at Home Depot. So technically, this chair cost me about $150. But wait till I take on another project - then all the supplies will be free!

April 14, 2011

Addicted to Pinterest

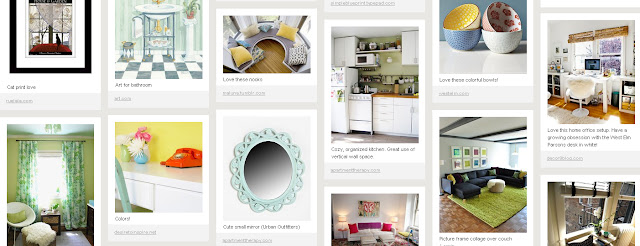
About a month ago, I discovered the most addictive awesome website for organizing ideas and inspiration, and I've been hooked on Pinterest ever since. For an organization-obsessed freak like me, this website is so perfect to keep all the random stuff I find all over the internet in one place. No more bookmarking on one computer, and being frustrated over not having the link on another computer. No more emailing myself links or saving them in a disorganized google doc. Those days are over, baby! (Yes, I am really that excited over Pinterest. Or it might be the massive amount of caffeine I ingested today. You decide.)

Anyway, the way Pinterest works is it allows you to create multiple "boards" to pin your ideas on. For example, you can have a board for interior decorating, a board for your favorite quotes, or a board for cute kitty pictures (no one will judge you). To "pin" something to your boards, you install a "Pin It" marklet in the bookmark section of your browser. Whenever you stumble upon something on any website that you want to find later, you just click that marklet and select the board you want to pin to. With a few exceptions (so far, I have found that this does not work for websites with Flash, or pictures posted on Facebook), this process is simple and easy to use.

I've been slow to ramp up my pinning frequency, but already I can see how useful this website is. I have a board called "For the Home", where I pin all the home decor related ideas. Already, I've discovered a trend: apparently, I tend to gravitate toward blue, green, purple, and white colors. I also like white furniture, and light and breezy decor in general. This was surprising to me because our apartment certainly does not feel light and breezy. We have lots of dark (and dark wood) furniture, and no white furniture at all! (Except for that chair I remade. More on that later.)


So how did this happen? And what can we do about it? Maybe it's time to paint those walls (yes, we rent, but we can always repaint before moving out, right?). And maybe we should actually put together our vision for the room BEFORE we buy anything next time. Lesson learned.

For the record, I was not paid or perked by Pinterest in any manner, I just think it's super-awesome.

April 6, 2011

Look right! Look left! Welcome to England.

When we recently returned from a ten-day trip to England, I discovered that I took approximately 560 photos while on vacation. Because, you know, it was absolutely essential that I really capture that church door in the best light possible. And that requires approximately fifteen photos per door. Obviously. What the camera did not capture is how I almost got run over by the British drivers, who insisted on driving on the wrong side of the road. For bright tourists like myself, the kind people of England wrote signs in huge letters that told me which way to look. Upon arriving at an intersection, I promptly proceeded to ignore these signs while trying to figure out which of the beautiful buildings before me is Westminster Abbey.

But that came later. First, the bf (from now on known as D) and I took a subway, a bus, a plane, another plane, another subway, and a train in order to get to Harrogate, UK. Harrogate was one of the four cities that we visited in England. Actually, it's not really a city, but a town. See, in order to be considered a city in the UK, you have to have a cathedral. Anyway, we ended up in Harrogate for our friends' wedding. Which was so beyond awesome that it included fireworks.


Harrogate itself was beautiful. The town is very cute, walkable, and incredibly green. And imagine our happy surprise when we discovered that Harrogate seems to be the design capital of England. Seriously, every other store had something to do with design, interior decorating, or antiques. I was in heaven.

The fancy hotel we did not stay in.
Next, D and I traveled to Bath. Mostly, we just wanted to try the thermal spa, and the spa was really amazing. With the 40 C water in the pools, it felt like we were swimming in a giant bath tub. Which, I guess, was the point. The open rooftop pool was particularly fun, at least until we had to resurface into the chilly England air.


Apparently, it is a requirement in Bath that all buildings must be build from limestone. So the entire city pretty much seems to be the same color. Not sure who decided that it was a good idea, but clearly they never read Apartment Therapy.

After Bath, we made a quick stop at Stratford-upon-Avon to watch the Royal Shakespeare Company perform King Lear. It was one of the most amazing performances I've ever seen. The new RSC building had just opened a few weeks prior to our arrival, and all performances seemed to sell out real quick. The entire town revolves around Shakespeare (and tourism). Stratford was the place where Shakespeare was allegedly born and raised. Which, perhaps, might explain the curious spelling on this parking sign:

D took this photo after I promised to make it my Facebook profile picture.
Having seen all of Stratford's six blocks, we moved on to London. And immediately got lost while trying to get to our hotel. Eventually, however, we figured it out, and realized in the process that we were staying in a pretty cool neighborhood. Our hotel was in Bayswater, which is between Kensington and Notting Hill. Very quickly, we discovered that London was extremely diverse. Perhaps that should have become obvious during our bus ride into London, when we spotted a Glatt Kosher Chinese restaurant. Seriously.

The following morning, we took the tube to the touristy area of London (where I did not get run over by a car while trying to locate Westminster Abbey). While we were trying to orient ourselves upon exiting the station, some cops on motorcycles arrived at the intersection and stopped all traffic. As we stood there, pondering this development, a motorcade drove up the street and the Queen of England waved at us. And that is pretty much the story of our trip to England that I tell everyone. The end.

Well, not really the end. Because of course we had to see the gorgeous architecture that surrounded us at every step of the way in London. And I had to take the mandatory fifteen photo minimum of each beautiful building. Like the Big Ben at the House of Parliament.


And the Buckingham Palace.


And a bunch of other popular destinations, like the Westminster Abbey (which we finally found), St. James's Park, the London Eye, Millennium bridge, Tower bridge, and Trafalgar square. In our four days in London, we squeezed in all that, plus a quick trip to Greenwich. Because I thought it would be beyond cool to stand on either side of the meridian line AT THE SAME TIME!

The meridian line.
So I have to say, our trip to England was pretty awesome. Even if everything was insanely expensive. To my surprise, Harrogate was my favorite city of the four that we visited. It was the least touristy and the most serene. The sunny weather helped, too.